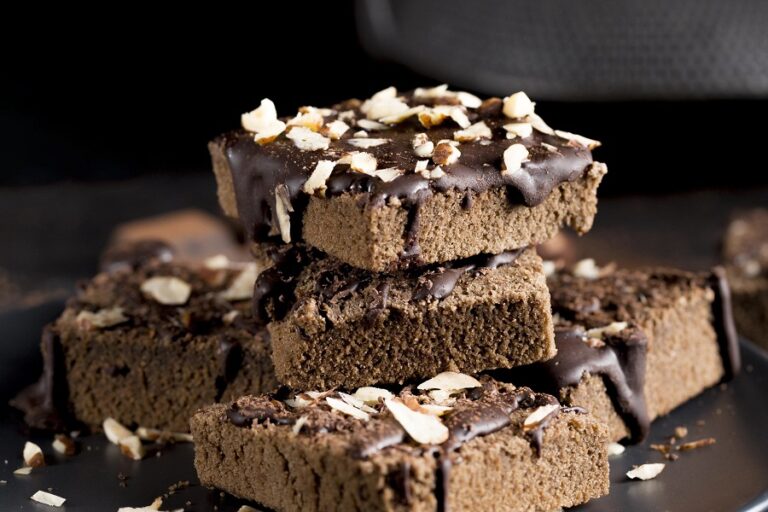
Indulge in Reese’s Cheesecake Brownie Bars: A Heavenly Combo of Chocolate and Peanut Butter
Welcome to a world where chocolate meets peanut butter in the most delightful way! If you’re looking to satisfy your sweet cravings, you’re in the right place. Let’s embark on a culinary journey to create the most decadent Reese’s Cheesecake Brownie Bars.
History and Origins of Reese’s Cheesecake Brownie Bars
The Reese’s Cheesecake Brownie Bar is a modern twist on classic American desserts. Combining the rich history of brownies, which originated in the United States in the late 19th century, with the iconic Reese’s Peanut Butter Cups, first introduced in the 1920s, this dessert is a true celebration of American confectionery innovation.
Tools Needed and Preparation Details
- 9×13 inch baking dish
- Medium mixing bowl
- Knife for swirling and cutting
- Preparation Time: 20 minutes
- Cooking Time: 40 minutes
- Total Time: 1 hour
- Servings: 12 bars
Ingredients and Substitutions
Here’s what you’ll need for these irresistible bars, along with some handy substitutions:
- Brownie Mix: 1 box (plus ingredients called for on the box). Substitution: You can use a homemade brownie recipe if preferred.
- Creamy Peanut Butter: 2 cups. Substitution: Almond or cashew butter for a different nutty flavor.
- Powdered Sugar: 1 cup.
- Vanilla Extract: 1 teaspoon.
- Cream Cheese: 8 ounces, softened. Substitution: Mascarpone for a richer texture.
- Reese’s Peanut Butter Cups: 1 cup, chopped. Substitution: Any chocolate and peanut butter candy.
- Semi-Sweet Chocolate Chips: 1/2 cup. Substitution: Dark chocolate chips for a deeper chocolate flavor.
Step-by-Step Directions
Follow these steps to create your delicious bars:
- Prepare the Brownie Base: Preheat your oven to 350°F (175°C). Prepare the brownie mix as per the package instructions and pour it into a greased 9×13 inch baking dish.
- Make the Peanut Butter Mixture: In a medium bowl, thoroughly mix together the peanut butter, powdered sugar, vanilla extract, and cream cheese until smooth.
- Create the Marbled Effect: Drop spoonfuls of the peanut butter mixture over the brownie batter. Use a knife to swirl the mixtures together, creating a marbled effect.
- Add the Toppings: Sprinkle the chopped Reese’s peanut butter cups and chocolate chips evenly over the top.
- Bake: Bake in the preheated oven for 35-40 minutes, or until the center is set and a toothpick inserted comes out clean.
- Cool and Serve: Allow the bars to cool before slicing them. Enjoy your homemade Reese’s Cheesecake Brownie Bars!
Top 4 Mistakes to Avoid
- Overbaking the Brownies: Keep a close eye on your brownies, especially after the 30-minute mark. Overbaking can lead to dry, crumbly bars.
- Not Softening the Cream Cheese: Ensure your cream cheese is at room temperature for a smooth, easy-to-mix peanut butter layer.
- Uneven Swirling: Don’t rush the swirling process. Take your time to create a beautiful marbled effect.
- Cutting the Bars While Still Hot: Allow the bars to cool completely before cutting. This patience pays off with clean, neat slices.
FAQs About Reese’s Cheesecake Brownie Bars
- Can I freeze these bars? Yes, they freeze well. Just ensure they’re properly wrapped or stored in an airtight container.
- How long do these bars stay fresh? Stored in an airtight container, they can last up to 5 days at room temperature or a week in the fridge.
- Can I use natural peanut butter? Yes, but it may alter the texture slightly due to its oilier consistency.
- Is there a dairy-free alternative for cream cheese? Yes, there are several plant-based cream cheeses that work well in this recipe.
- Can I add nuts to this recipe? Absolutely! Chopped nuts like almonds or pecans can add a delightful crunch.
Conclusion
Creating these Reese’s Cheesecake Brownie Bars is more than just baking; it’s an adventure in flavors and textures. Whether you’re a seasoned baker or new to the kitchen, these bars are sure to impress. Happy baking!

